

These days, with so many other ways to make coffee at home, I can feel overpowered even before I start. Here to make it easier. To simplify your choice, I’ve narrowed down five popular methods you can try. Whether you prefer a strong espresso or a smooth, aromatic cup, there’s something here for everyone. Let’s explore how you can elevate your home coffee game!
Contents
What is Coffee?
Coffee comes from the works, which grows cherries with beans. These trees can grow tall, but growers keep them fast for easier harvesting. Plants have overgrown leaves and can have blossoms and unripe and grown cherries at the same time.
It takes about a year for a cherry to mature fully, and the trees have the most hot drink beans when they are 7 to 20. Each tree can provide about 2 pounds of beans every year. Mostly grown in low areas, where the climate is kind with good rain and wealthy soil.
Top 5 Coffee Brewing Techniques
If you want to know how to start brewing high-quality coffee from your home, keep reading. I look nearer at the five most common hot drink glasses – drop hot drink, coffee, pour-over, latte, and cold brew. Knowing basic methods, tips, and tricks for brewing techniques is important.
Drip Coffee
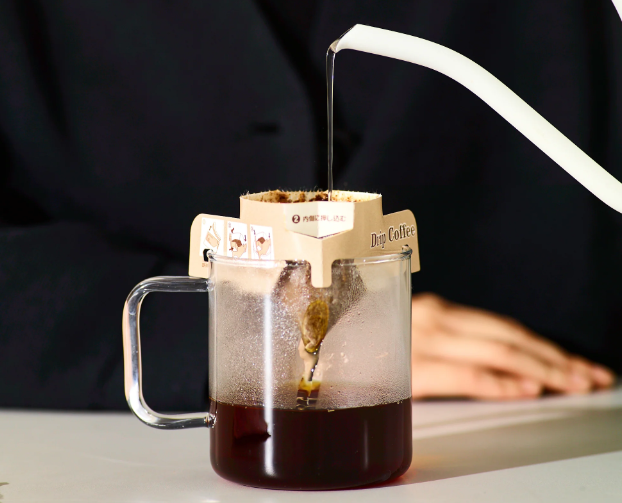
Drip hot drink is a popular brewing procedure known for its clearness. You enjoy this brew method whenever you order a house or use a percolator at the house. Drip involves hot water leaking via a basin filter. It brews hot water and gravity into a pot or carafe. It’s a famous brewing process in many households and eateries due to its comfort in making hot drinks at once.
How to Make Drip Coffee
- Seek a standard ratio of 1 to 2 tablespoons of flour for every 6 ounces of water. Depending on how deeply you like your coffee and your supplier’s rules, this can be adjusted.
- Use a medium effort that reaches sea salt. This size is ideal for dot brewing since it allows optimal water touch without over-extracting.
- Place a clean in the basket. If utilizing a paper filter, study flushing it with hot water first to remove any paper stays and taste. Add your base to the filter.
- Fill the coffee maker’s pool with the water needed. Start the device, wait as it heats the moisture, and slowly run it over. The entire method should take almost 5 to 10 minutes, depending on your machine and the amount you are making.
Equipment Needed
Drip Coffee Maker: Select from various ideals, from basic machines to refined brewers with programmable elements.
Coffee Grinder: A burr grinder is recommended for consistent medium tasks. Avoid using a cutter hero, as it can produce uneven decaf settings. But, if there were a brew process that a blade sub is fairly safe for, it would be with drip brewing.
Filters: Depending on your decaf creator, you may need paper or reusable filters created for your exact model.
Espresso
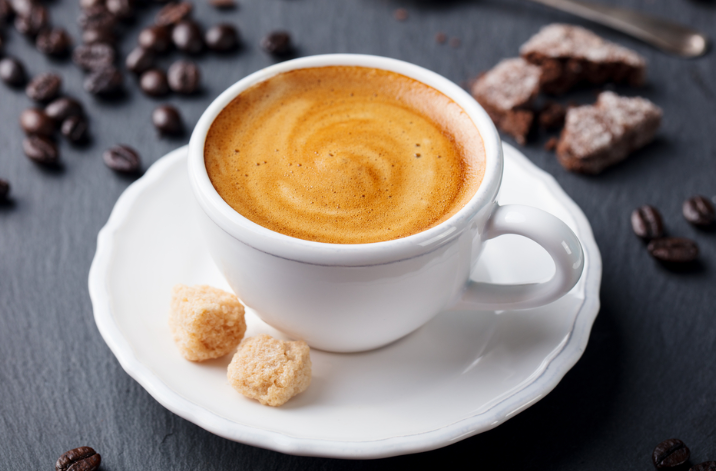
Espresso is a focused form of espresso brewed using extreme heat and force. Known for its bold taste and creamy top layer, called “crema,” espresso is the brewing basis for many popular, such as lattes.
How to Make Espresso
- Start with very fine espresso settings, nearly like powdered sugar. The fine effort is important because it slows the water and removes more flavour.
- Use about 18-21 grams of coffee for a typical double shot of espresso. Follow the education on your espresso device in case it only pulls a single shot at a time.
- Press firmly with an interstitial once the drink is in the espresso machine’s portafilter. This step is vital to provide an even, tight bed of decaf that will be removed uniformly. Without an even tamp, you may have a very sore shot.
- Close the portafilter into the espresso device and start the brew cycle. A good espresso normally takes about 18-24 seconds to pull.
Equipment Needed
Espresso Machine: This is the basic tool for brewing espresso. Various types of devices are public, from automated arrangements to manual press machines.
Coffee Grinder: Invest in a burr sub for even fine jobs just for espresso. More affordable blade subs cannot achieve the surface and good grind set needed for brewing espresso.
Tamper: This tool shortens the decaf in the portafilter and provides an even brew.
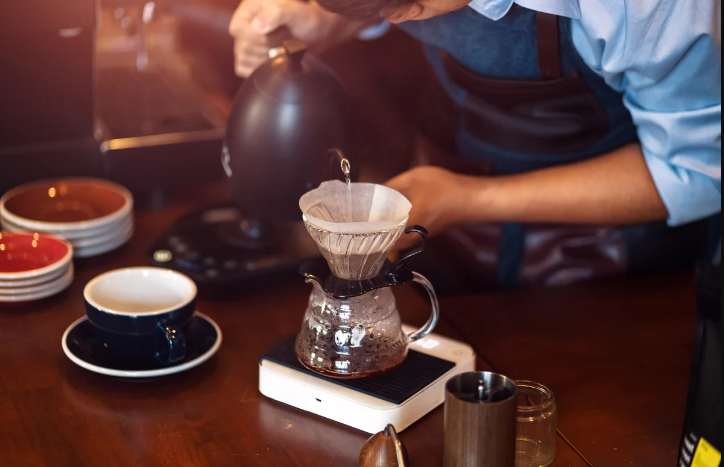
Pour-Over Coffee

Pour-over claims many likenesses with drip brewing. It uses the same codes for brewing but requires a more manual process to make. Mostly used for brewing a single cup of coffee at a while (though not always). Creating decaf via pour-over will give you full rule over all the brewing variables, such as brew rate, task size, and water temperature.
How to Make Pour-Over Coffee
- Generally, use about the same balance of decaf and water that you would use with a dot brew. This ratio can be changed just by counting on your preferred power and the clear drink beans used for brewing.
- Aim for a medium-fine grind, a bit rougher than sand (and a bit better than dot brew). This size allows for optimal extraction since you retain full control over the timing.
- Set your pour-over brewer (such as a V60 or Chemex) on a carafe or mug. Insert a paper or textile filter, flush it with hot water to fire any paper, and preheat the pour-over.
- Add your floor to the filter and gently run hot water (just off the spot, around 200°F) over the bases to water them evenly. Use enough water to wash the feet (about twice the weight dose) and let it sit for 30 beats. This step lets the degas, leading to a better, even, flavorful extraction.
- After the colour, pour the water in a slow, regular circle, starting from the middle and moving out. Be sure to pour over all the dirt evenly. The brewing time should be almost 2 to 3 minutes for fewer parts and up to 4 minutes for larger servings.
Equipment Needed
Pour Over Brewer: For common types, add the V60, Chemex, or Kalita Wave. Per has a special filter shape and design that impacts the brewing flow and taste.
Kettle: Ideally, use a gooseneck kettle for finer control over the pouring speed and exactness.
Scale: A digital scale helps count the decaf and water accurately, which is vital for even results. You can get away with counting scoops, but they are less precise.
Grinder: A burr sub is also recommended with pour-overs to earn a consistent grind size.
Lattes
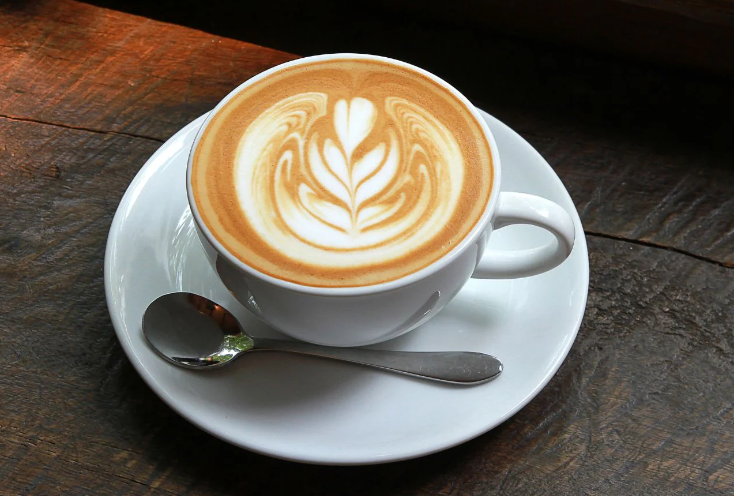
At no point in the year are lattes ever great and popular, so it’s important to know the brewing process. It uses coffee shots and steamed milk (sometimes with syrups or other tastes) to create a very smooth and lovely cup. However, it takes some additional tools and skills to make it.
How to Make a Latte
- Since I have already hidden it, begin by preparing a try or two using your coffee engine, as brewing was described before. Normally, a latte has one or two coffee shots, counting on the cup measure (12 vs. 16oz).
- Fill a metal cooking pitcher halfway with cold milk. Any type of milk will perform, but whole milk is traditionally used for its fine texture. Position the mist wand just below the milk cover to create a smooth, silky microfoam. As the milk heats, slow down the pitcher to keep the rod below the cover and avoid creating too much foam.
- First, pour the freshly brewed into your cup. Then, run the steamed milk into the cup with the coffee. Start from a size originally, and then bring the pitcher nearer to the cover as you pour. This technique helps merge the milk into the coffee smoothly. Aim for about a 1-2 cm coating of milk foam on top.
Equipment Needed
Coffee Machine: As already stated, brewing coffee for a latte needs a proper coffee machine. This machine can be automatic or manual.
Steam Wand or Milk Frother: This is normally part of your coffee machine and is used for heating and frothing the milk. Some coffee machines do not have a steam wand and are made only for brewing, so you’d need a different device.
Metal Steaming Pitcher: The pitcher is used for boiling milk. Its shape and fabric help control the frothing function.
Cold Brew
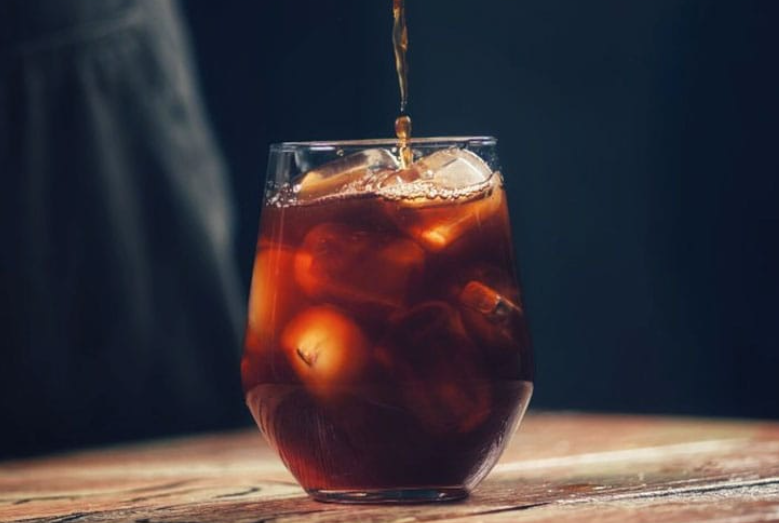
Cold Brew coffee is vastly different from the other brewing methods noted above. It is very smooth and vital. It’s getting increasingly famous, mainly during the summer months, when somebody doesn’t prefer brewing hot drinks. It counts on coarsely based coffee, a cold water extraction process, and plenty of time to create this amazing hot drink incident.
Read also: Can You Freeze Almond Milk?
How to Make Cold Brew Coffee
- Start with a coarse effort, similar to the length of raw sugar. This ensures a slow extraction and stops brewing, resulting in becoming upset from over-extraction.
- Mix ground coffee with cold water in a big jar or pitcher. A good starting balance is 1:8, with one piece eight pieces of wetness. Leaning on your brew container, you will need a metal miter or an insertable paper filter.
- Wrap the mix and let it water at room temperature or in your refrigerator for at least 8 to 12 hours. You can experiment with steeping brewing times to find the power and flavour profile that suits your taste.
- After watering, strain the coffee via a fine-mesh sieve (unless you use an immersable filter) or a material to remove the dirt. This brewing trick divides your coffee concentrate from the piles of earth.
- Dilute the concentrate with moisture, milk, or your favourite creamer according to your choice. Cold brew can be served over ice for a tonic drink. Usually, you’ll use a 1:1 ratio of cold brew focus to water.
Equipment Needed
Large Jar or Pitcher: For filling with the coffee. Some containers have a special cold brew filter where you place the grounds, while others need filtering after the fact.
Grinder: A burr grinder is preferred for even coarse grinds. Brewing cold hot drinks needs the coarsest caffeine grounds of any other brew method, so a grade grinder is needed to get to those low stages.
Strainer: A fine-mesh sieve, cheesecloth, or specialized cold brew caffeine filter. Again, this depends on whether your cold brew receptacle has something built-in.
Conclusion
Coffee brewing at home shows various ways to suit different tastes and choices. Drip caffeine is simple and ideal for making large amounts, while coffee has a strong, concentrated flavour. Pour-over gives full power over brewing, resulting in a neat, rich cup. Lattes mix coffee with steamed milk for a creamy, soft drink. Soaked in cold water, cold brew is ideal for a vital, low-acid option. Each method needs specific tools and techniques but allows you to enjoy high-quality from the ease of your home.