
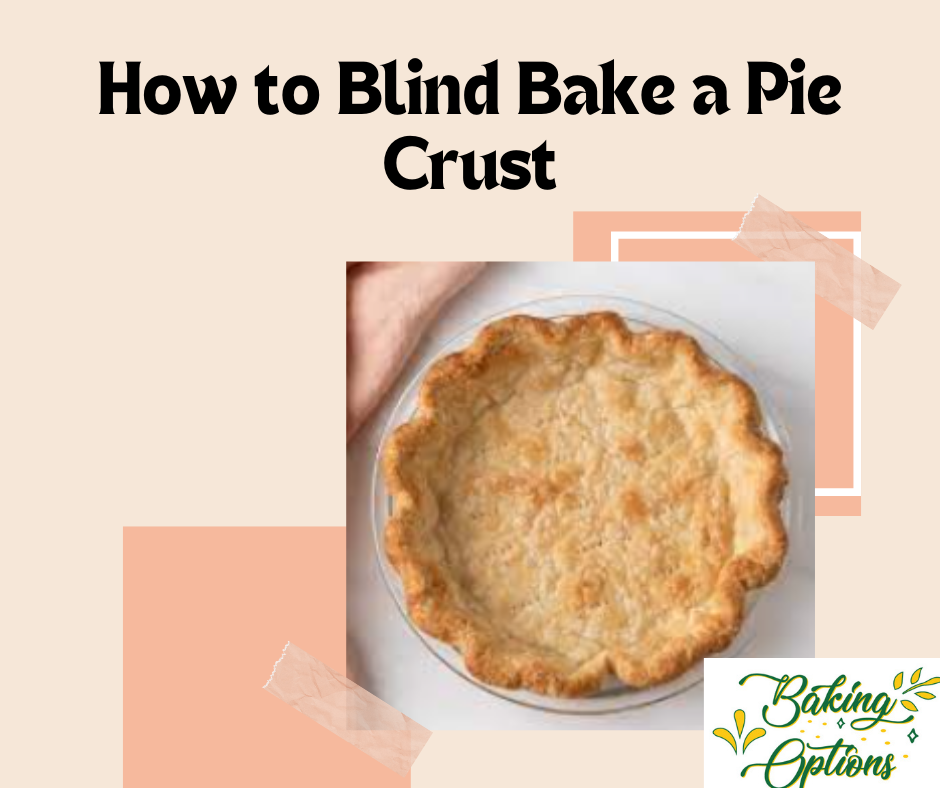
Blind baking a pie crust is necessary to ensure a perfectly crisp & flaky crust, especially for pies with a custard or cream filling. It stops the crust from becoming soggy and gives you a perfect texture pie. In this article, I’ll walk you through a simple recipe, and you will get how to blind bake a pie crust.
Contents
What is Blind Baking
Blind baking is the process of partially or fully baking the pie crust without the filling. It is probably pretty simple; imagine it. But here’s the catch: If you are using pastry dough for your pie instead of crumb crust, you cannot simply put the dough in the oven as is.
The reason for this is all in the structure of pie dough. Pie dough contains flour, liquid, and fat. Layers of fat on the flour particles make the dough soft or “short.”
Well done if you have managed this. Steam will develop during baking to produce the great layers we all love. But where there is no filling to provide pressure for the base and sides of the pie shell, the dough may nicely puff, shrink, or even slumber—ugh! 😣
My Recommendation
The good news? You do not have to experience this sort of cooking failure. Just load down the shell with a temporary filling while it bakes. This action helps the dough get crisp outside but remain well-shaped, so your pie crust will be excellent.
What You Need For Blind Bake a Pie Crust
- Homemade or store-bought pie dough
- 9-10” (23-25 cm) pie plate
- Fork
- Parchment paper or aluminum foil
- Pie weights (or dried beans)
- Baking sheet
- Oven preheated to 375°F (190°C)
Easy Step To Blind Bake a Pie Crust
In 8 easy peasy steps, I will tell you how to blind bake a pie crust. Trust me, these are very simple steps, but the main thing that matters is that you need to follow the right process.
Step 1: Make the pie crust.
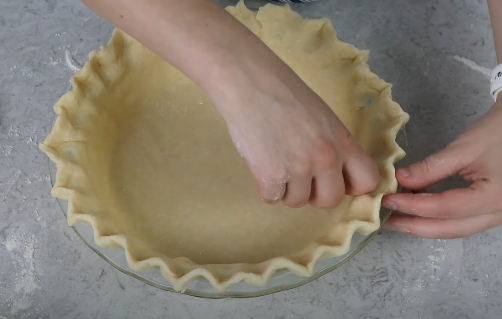
- Make sure your pie crust is ready before you engage in blind baking. Leave the dough on the counter’s surface and slip it onto your 9-10-inch pie plate.
- If you use homemade pastry, lift any overhanging dough and fold it underneath to the edge of your pie plate to make a better cookie lid.
- You can either flute or crimp it to make the edges more fashionable. When fluting, ensure that the crust rests on the rim of the pie plate and not within the rim. It’ll help prevent the crust from falling soon after being put to bake.
- After placing the pie on the plate, put it in the refrigerator for at least twenty minutes. It makes the need to chill the dough so that it holds its shape when it is being blind baked necessary. After preparing the crust, place the pan in the refrigerator for 30 minutes. Next, set your oven’s temperature to 375°F, or 190°C.
- Don’t let the pie stay in the freezer for more than 40 minutes so that the crust does not get too hard, as this can lead to the cracking of glass or ceramic pie plates when exposed to heat.
Step 2: Chill the Pie Crust
Now that your pie crust is on your pie plate and your edges are set, it’s time to put it in the freezer. Chill the dough before baking to ensure it firms up and maintains its shape. I always recommend that the audience and friends leave them in the freezer for at least 20 minutes.
Let the dough rest for 10 minutes, then preheat your oven to 375°F (190°C). In my oven, it usually takes approximately 15 minutes (or more) to heat up to 375°F, which gives the dough enough time to cool down.
Important Note: Do not freeze the pie crust for more than forty minutes. If it starts to solidify, it becomes so stiff that during baking your glass or ceramic pie plate cracks.
Step 3: Line the Pie Crust
When your pie crusts are ready, frozen and cold, remove them from the freezer compartment. It also helps to grab the bottom of the pie crust at this stage, but you can do this before chilling. Either way works.
Next, chill your pie crust, bake it, and then line it with parchment paper or aluminium foil. Fill the pie crust completely and let the filling rise slightly above the edges.
Step 4: Add Weights
Well, it’s time to put your pie weights. As for the pie weights, I have ceramic ones, but you can also use dried beans, rice, etc.
Place the lined pie crust on these weights so that the weights reach the edges of the pie crust. It helps to firm the crust and ensures even baking.
- I suggest putting your pie dish on a flat baking tray. This way, lifting and moving the pie in and out of the oven is much simpler without any spills or mess.
After this, keep it in a preheated oven for 15 minutes and let it bake well.
Step 6: Pierce the bottom and take out the weights
After 15 minutes, carefully remove the pie crust from the oven. You do not want to turn off the stove just yet. Remove the pie weights, using the edges of the parchment papers or foils; put them into a heatproof bowl to cool down as they are hot.
If the weights are out, grab a fork and prick the bottom of the pie crust all over, too. It’ll help them avoid the formation of bubbles at the bottom when baking the cookies for the next round.
Step 7: Final Bake
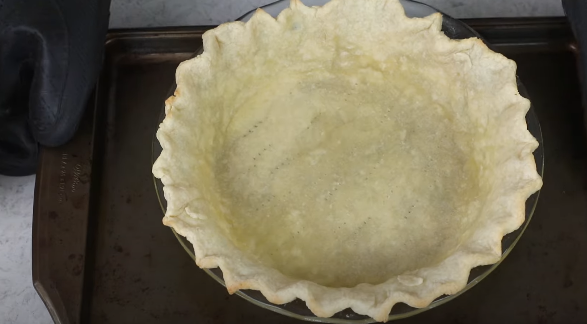
Place the pie crust back in the oven and bake for 10 to 15 more minutes, or until the crust is golden brown and the bottom is cooked thoroughly. After ten minutes or so, start checking the crust. Also, we need a crunchy and a golden brown outside texture.
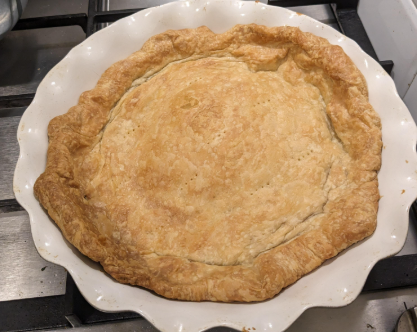
Step 8: Cool it & Use
Once you bake them nicely, take them out of the oven. You can either let them cool down or use them hot, depending on the recipe you baked them for.
Are Blind Baking and Par-Baking the Same?
The technique is the same, but baking time is the primary and crucial factor that separates the two methods. When you par-bake a crust, you quickly bake it, hoping to add a filling later, then bake it at a higher temperature again.
At the same time, blind baking means baking the crust right until it is ready to receive a no-bake filling. Many times, most people think that both terms are the same! I prepared it with both methods, so they should be okay and good.
How Can I Stop Pie Crust From Shrinking?
During the entire process of making pie crust, there are various things that you can do to prevent pie crust from shrinking.
- Don’t Overwork the Dough
It all starts with the preparations and the formation of the dough. When mixing or kneading it, ensure you do not overmix it, as this will only pull in more gluten strings, which will shrink when baked. So, work gently and do not apply much pressure to the dough!
- Chill, Chill, Chill!
Refrigerate the dough for at least half an hour after each step. This relaxes the gluten strands and resets the fat to become tender and flaky with the crust.
- Choose the Right Pie Dish
It is advisable to use a glass or metal pie dish. These materials allow for even browning & cooking. They also prevent the crust from sliding down the sides, which is not good, especially for ceramic dishes.
- Blind-Bake Long Enough with Weights
A couple of points I learned when blind baking is to use weights and bake enough time. It is used to weigh the crust down and prevent it from rising. You’ll understand what I mean once you try it in ceramic dishes—wow!
Read Also: Chili Cornbread Pie
Final Words
Is it clear now how to Blind Bake a Pie Crust? It’s pretty simple! This method is beneficial for your next pie-making adventure. If you try, I’d love to hear how it turns out!