

People throughout the holiday period look for recipes to elevate their holiday celebrations to greater heights. Little Debbie Christmas Tree Cakes represent a delectable recipe that wins over many hearts during holiday time.
Its delicious taste and cute appearance win over not only children but adults as well. The recipe has been known to me since my first encounter with it which resulted in an annual tradition of baking for every holiday.
This article provides step-by-step instructions for preparing the dessert with a creative twist. I will point out important points for novices throughout my discussion.
Contents
What Are Little Debbie Christmas Tree Cakes?
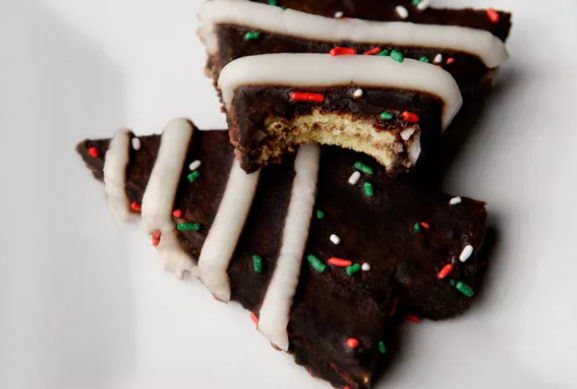
These are Christmas tree cakes with a soft yellow cake in them. Every cake is stuffed with a velvety filling and then coated with a layer of white chocolate. They may also be garnished with attractive icing colors.
These cakes have become very popular, especially during the holiday season back in the United States, mostly because they bring beautiful memories. The combination of sweet flavors and tender texture makes them yucky, sweet treats that everyone loves at Christmas.
Recipe Overview for Little Debbie Christmas Tree Cakes
| Complete Recipe Timing | |
| Preparation Time | 30 minutes |
| Baking Time | 20-25 minutes |
| Cooling Time | 1 hour (or until completely cool) |
| Assembly and Decorating Time | 30 minutes |
| Total Time | Approximately 2 hours (including cooling time) |
Little Debbie Christmas Tree Cakes Ingredients
For the Cake
- A light texture is achieved with 3 cups (345 g) of cake flour.
- Two teaspoons (8 grams) of baking powder: aids in the cake’s rising.
- 1 tsp (6 g) salt: improves taste.
- One cup (226 g) of unsalted butter at room temperature adds richness
- To sweeten the cake, use 1¾ cups (350 g) of granulated sugar
- Five eggs, whole and at room temperature
- Two egg yolks at room temperature: Provides richness and moisture
- 2.4 g (2 tsp) clear vanilla extract: Provides a traditional vanilla taste
- 240 grams, or one cup, of room temperature sour cream
For the Whipped Cream Filling
- Make a light filling with 3 cups (693 g) cold heavy whipping cream
- One cup (125 grams) of sifted powdered sugar: It adds sweetness to the filling.
- 2 tbsp E-Z Gel (or similar stabilizer)
- 1 teaspoon vanilla extract: Adds flavor
For the White Chocolate Coating
- 2.5 lbs. good-quality white chocolate: Provides a smooth coating
How to Prepare Little Debbie Christmas Tree Cakes: Instructions With Tips
Step 1: Cake Preparation Step
- Preheat oven to 163°C.. My first task is to switch on the oven preheating so that our ingredients are ready as soon as the oven is hot.
- Use a 11″ x 15″ rectangular baking pan and thoroughly coat its walls with cooking spray. Use either butter or oil instead of cooking spray as a replacement. Pan preparation intends to stop the cake from breaking while removing it. I nearly forgot! Line the bottom of the pan with parchment paper to prevent the cake from sticking.
- Mix the flour, baking powder, and salt of cake flour and baking powder and salt in a medium bowl. It is just a matter of making sure everything is mixed together before setting the bowl aside.If flour is lumpy, sift it; this ensures the texture is light. Regardless of whether I have less quantity of ingredients, I employ the use of a medium or a large-sized bowl since it avails protection for any ingredients that might spill over when blending.
- Beat in the eggs gradually and continue to mix the batter after each addition. Mix in egg yolks, vanilla extract, and sour cream. Add every ingredient together and continue mixing until it is thoroughly combined.
- The dry ingredients should be added to the wet ones gradually. Add the ingredients and blend on low speed until just combined. Keep your ingredients from being overmixed; the cake may need to be fluffy and light.
- Level the top of the batter with a spatula after pouring it into the pan you have prepared. Bake for 20-25 minutes or until a toothpick is put in the center & it appears unsoiled. Because they bake fast, remove them from the oven after 20 minutes to avoid burning.
- When your cake is ready, remove it from the oven and set it aside for ten minutes, according to your instructions. After that, place it on a wire rack and let it cool before cutting.
Step 2: Cut & Shape
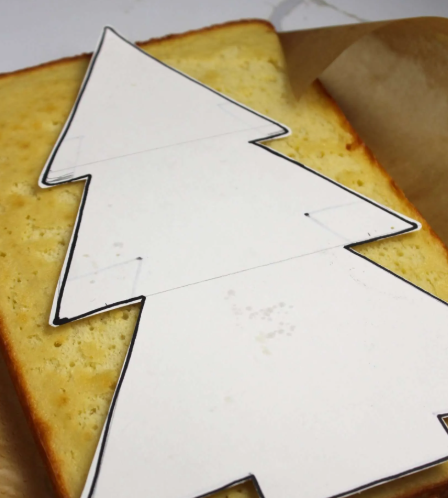
Once your cake has cooled completely, simply cut it into shapes. If you have a tree-shaped cookie cutter, that’s great! However, creating this shape isn’t too difficult if you don’t. A baker is always creative, so cutting this shape shouldn’t be a challenge for you—just make sure to use a sharp knife or cutter.
Step 3: Make The Filling
- In one of the large bowls, pour the cold, heavy cream required for whipping. Then, using an electric mixer on medium speed, whip it until the peaks are soft, which creating soft peaks.
- Use chilled mixing bowls and beaters to achieve some of the best outcomes. These are my favorite kitchen tools that help the cream whip up faster and fluffier.
- Slowly incorporate this sifted powdered sugar into the whipped cream as you further whip it. Mix the mixture continuously until stiff peaks form on the surface.
- Add the E-Z Gel, folding it softly to stabilize the cream; mix vanilla extract at this point.
Step 4: Assemble the Cakes
Divide each tree shape equally by cutting them horizontally into two different sections.
When you have your trees in their shape, apply a thick layer of whipped cream filling over one of the ‘halves’ of a tree and then place the other ‘halve’ on top to make a sandwich.
Step 5: Cover with chocolate
- I usually use two methods to melt white chocolate: the double boiler and microwave.
- Dip each assembled tree into melted chocolate and make them fully covered.
- Afterward, transfer coated trees to parchment paper to set—this process would be easier with a fork or a dipping tool.
Step 6: Decorate
If chocolate is set, you can place colorful toppings to make cakes look perfect for holidays.
Is it an Easy Recipe for Beginners?

Of course! This recipe is suitable for beginners.
Clear Instructions
- The process is explained in detail to help everyone understand it easily.
Simple Techniques
- Baking batter, whipping cream, and melting chocolate are basic baking tasks in regular kitchen routines.
Room for Creativity
- To taste, you can change the spice level, or if you decorate these mini pies, you can change the toppings.
FAQs
Can I freeze them?
Yes! Uncoated cakes will keep for up to three months, so wrap them in plastic first, then aluminum foil, before freezing.
Which Ingredient Can I Use in Place of E-Z Gel?
Substitute cornstarch or instant pudding mix for E-Z Gel to stabilize the whipped cream filling. It is advised to use about one tablespoon beforehand, & to adjust or reduce based on personal needs.
Is it possible to make these cakes gluten-free?
A gluten-free flour blend is is better suited for baking compared to cake flour. Make sure all the other ingredients you use are also gluten-free.
Final Words
Homemade Little Debbie Christmas Tree Cakes are the best for enjoying during the holidays. Whether sharing them in family crowds or enjoying them with friends, these cheerful cakes will bring joy this holiday season.