
If you want to quickly make something interesting, tender, juicy, and healthy for dinner, you are missing the oven-baked chicken tenderloins recipe. If you don’t know how to make this recipe and how long to cook chicken tenderloins in oven, don’t worry; just read the full article.
Contents
Factors On Which Oven-Bake Chicken Tenderloins Timing Depends
Before I start writing in detail, let me make it clear that this time is not exact; it depends on certain factors, and it’s important to keep these factors in mind before baking.
1. Oven Temperature
It means that the baking temperature of chicken tenderloins determines the time needed to cook them. An advantage of a higher temperature is that foods take less time to cook, although there is a disadvantage because meats can quickly become dry if not monitored closely. Standard temperature settings include:
350°F: 20-30 min
400°F: 15-20 minutes
425°F: 12-15 minutes
2. Thickness of the Tenderloins
The chicken tenderloins need to be of the required size and thickness. I experimented with different chicken pieces. Some were thick, and some were thin. It was my first experiment, and I noticed thicker pieces of meat take longer to cook than relatively thinner ones.
Always choose tenderloins that are the same thickness or, if they are not, flatten them to the same thickness before baking.
- Fresh vs. Frozen
Any cooking process that begins with frozen food will take longer than at room temperature. If chicken tenderloins are frozen before baking, I recommend increasing the cooking time by 5-7 minutes in each temperature setting.
It is also essential to check that the internal temperature goes up to 74° C to avoid health risks.
- Utilizing a Meat Thermometer
It is crucial to use a meat thermometer to avoid overcooked or dry chicken meat. Poke it to the thickest part of the tenderloin; it should average 74°C when done.
- Resting Time
Baked chicken tenderloin recipes must be permitted to remain for 10-15 minutes after they bake. This resting period helps preserve moisture since juices reabsorb throughout the cuts, making the meat tender and flavorful.
How to Bake Chicken Tenderloins In Oven
Step 1: Mix Spices
For my basic recipe, I first always melt almost three tablespoons of butter over low heat. Once it becomes glossy, before reaching the dark-brown color preferred by some aficionados, remove it from the heat and mix spices. I love using:
- 2 teaspoons garlic powder (figure out these measurements after many attempts)
- 1 tablespoon smoked paprika (I don’t skimp on this ingredient; go for the best one!)
- 1 teaspoon sea salt
- Fresh cracked pepper to taste
I once bought two bottles of paprika and used them both by mistake during rush hour, and what came out was superb.
Step 2: My Foolproof Coating Technique
The best way has been to dredge each tenderloin in the beaten egg and then into the breadcrumbs. I stayed here for some time; one mistake a junior chef can make is moving on too quickly—that was my first experience.
I place them on a parchment-lined baking tray so they do not touch each other. In my experience, two baking sheets are enough when preparing food to feed many people.
Step 3: The Perfect Bake
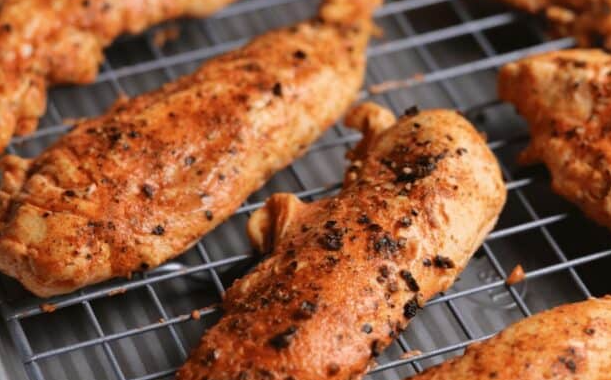
My preferred oven temperature is 180°C. Over time, I’ve discovered that cooking for 27 minutes is often sufficient, but I always double-check with my meat thermometer. The chicken should reach an internal temperature of 165°F, or 74°C. While working in restaurants, I noticed many cooks undercooked the chicken because they weren’t sure how long to cook it. A thermometer eliminates that uncertainty.
Step 4: My Signature Finishing Touch
Lastly, shift to broil for that restaurant-type appearance. Typically, just 2-3 minutes of engaging in herd behavior is sufficient. I strive to ensure that everyone who sees and tries it is left saying “wow” every time Daisy presents it 😀.
Tip: After cooking, give the food a 5-minute break before digging in. I know it’s tough to wait, but taking this time helps keep the food nice and juicy!
What To Do With Leftover Oven-Baked Chicken Tenderloins
Fresh Storage
Put these lovelies in an airtight container and stash them in the fridge for 3-4 days. Use glass containers with snap-on lids—a habit I got from my first kitchen job, where plastic containers always seemed to disappear!
Freezer Magic
Once completely cooled, put them in a freezer bag. They’ll stay perfect for up to 2 months. My everyday opinion: always write the date on the bag—a simple trick that’s saved me from many “How long has this been here?” moments 😂.
Daisy reheating methods
Oven: Pop them on a baking tray at 350°F for 5-7 minutes
Air-fryer: 3-4 minutes at 375°F to get that great crisp
Skillet: Quickly warm them up on medium heat
Microwave: Only if you’re desperate (but, between you and me, I don’t actually do this—not really)
Can I use Chicken Breast For this Recipe?
Chicken Breasts
We work with chicken breasts daily and appreciate their versatility. These more significant cuts from the underside of the chicken are perfect when you want a more substantial piece of meat. So they are suitable for:
- Sunday roast specials
- Grilled chicken salads
- Stuffed chicken dishes
Last summer, we catered an event where we grilled 200 chicken breasts. The key was watching that internal temperature like hawks!
Tenderloins
These more petite strips hold a special place in our hearts. We often joke that they’re like the VIP section of the chicken—more tender and quicker to cook than their bigger cousins 😀. When I’m overwhelmed during a busy service, I find these extremely helpful because
- They cook quickly.
- They’re naturally more tender.
- Perfect portion control for appetizers
- Making the Right Choice
For Chicken Breasts
- Roasting and grilling (they can take it!)
- Slow cooking methods
- When we need to make an impression
For Tenderloins
- Quick stir-fries
- When we have to present it evenly and cook it super fast
I recall a moment when a new chef tried to use a different part of the chicken in our famous stuffed chicken dish—let’s just say it didn’t turn out well! We realized that some shortcuts just aren’t a good idea.
My Coating Tips For Oven-Baked Chicken Tenderloins
The juicy, tender recipe’s coating plays a very important role, especially for this recipe. I will share all the tips on how to do the coating. These tips will be beneficial for you. So, next time you try this recipe, follow these coating methods.
Use Panko breadcrumbs instead of regular ones.
- Replace Regular Breadcrumbs With Panko
We usually use the same regular breadcrumbs in every recipe. If you feel your recipe isn’t tender, try replacing them with panko breadcrumbs; they make the tenderloins super crispy.
They are a common ingredient in my recipes. I’ve tried both types of breadcrumbs, but I recommend trying panko breadcrumbs just once.
- 3 Separate Containers For Coating
Prepare three distinctly different containers’ for the breeding purposes. The first dish should have flour prepared with seasoned salt, the second dish should be egg, beaten with water and seasoned salt, and the third dish should be breadcrumbs. This setup organization yields better regulation of the breeding cycle.
- Press Panko into Chicken
When using the chicken strips to plunge into the egg wash, use your hands to pat the panko breadcrumbs into the chicken thoroughly. It makes sure that every surface is well covered, thus helping to make it crispy once baked.
- Bake on a Cooling Rack
Put the breaded chicken tenders on a cooling rack and set it on a baking sheet so the drippings will fall through.
It improves air circulation while baking and creates a crunchy texture without turning the chicken.
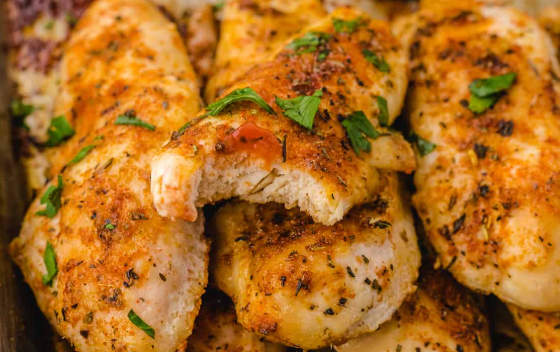
Final Takeaways
Baked chicken tenderloins take around 20-30 minutes to cook. This recipe is so tasty that if you present it to someone, they won’t believe it was prepared in under 30 minutes. I hope you understood the timing and my tips. I want to emphasize that for extra crispiness, if you coat them using the methods I shared, you’ll get 2x the results.