
Ballerina Farm is a beautiful and sustainable farm in the Utah mountains. It’s known for organic farming and traditional practices, representing a simple, wholesome lifestyle.
Several acres of crops, animals, and handcrafted goods are found on this farm, which was founded by former ballerina Hannah Neeleman.
Traditional bread-making methods, like those for sourdough, require patience and skill, fitting the farm’s focus on sustainability and mindfulness. This slow approach results in more digestible and nutritious bread, as fermentation breaks down gluten and releases nutrients.
For Ballerina Farm, making sourdough bread is about enjoying the process and creating wholesome food by hand. I am going to tell you the recipe for Ballerina Farm Sourdough Bread.
Contents [hide]
What Makes Sourdough Bread So Unique?
Sourdough has a longer shelf life because the organic acids produced during fermentation inhibit mold growth. This fermentation will also give it complex flavors, a tangy, slightly sour taste, and subtle nutty notes.
It also confers digestive benefits, given the breakdown of complex carbohydrates and proteins through fermentation. Overall, it stands out because of its sourness, flavors, textures, and possible health benefits.
This long fermentation also gives a chewier texture to the bread and an airy crumb structure with irregular holes. Sourdough makes bread unique compared to bread made by commercial yeast because its fermentation is natural using wild yeast and lactic acid bacteria from a sourdough starter.
Ingredients
Flour Types and Quantities
- Bread Flour: 500 grams (about 4 cups)
- Bread flour provides a high protein content, giving the dough structure and a chewy texture.
Water Specifications
- Filtered Water: 375 grams (about 1 ½ cups)
- Use room-temperature filtered water to avoid any chlorine or impurities that might hinder the fermentation process.
Salt Type and Amount
- Sea Salt: 10 grams (about 2 teaspoons)
- Sea salt fortifies the dough structure and improves bread flavor.
Sourdough Starter Details
- Active Sourdough Starter: 100 grams (about ½ cup)
- The sourdough starter should be active and bubbly, indicating that the yeast and bacteria are thriving.
Notes on Ingredient Quality and Sourcing
Organic and Local Ingredient Suggestions
- Flour: Choose organic, unbleached bread flour for the best flavor and nutritional benefits. Local mills can often provide high-quality flour.
- Water: Filtered water confirms that no chemicals could affect the fermentation.
- Salt: Opt for natural sea salt or Himalayan salt for added minerals and purity.
- Sourdough Starter: Using an established, healthy starter from a local bakery or farmer’s market can give your bread a unique local flavor.
Impact of Ingredient Quality on Bread Outcome
Flavor: High-quality, organic ingredients contribute to a richer and more complex flavor profile in the bread.
Texture: Better quality flour results in a dough that is easier to work with and a bread with a superior texture.
Nutritional Value: Organic and locally sourced ingredients often retain more nutrients and are free from pesticides and other chemicals.
Fermentation: Pure water and high-quality flour support a healthier fermentation process. The texture and flavor of the bread need to develop.
Why Is Sourdough Bread Unique?
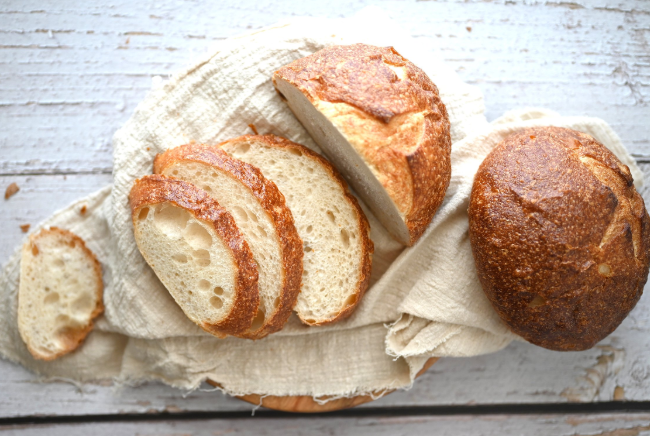
Each loaf is baked to perfection—you don’t even want to know what those random dots (we refer to as ‘crumb’) are—they are like pretty little fingerprints of nature.
Tools and Equipment
Note down these essentials and some optional tools for making the Ballerina Farms Sourdough Bread Recipe.
Mixing bowls
Bench scraper
Proofing baskets
Baking stone
Kitchen scale
Dough whisk
Thermometer
Preparation of Sourdough Starter
To cultivate wild yeast and bacteria from the environment, sourdough starters are made of flour and water. The natural fermentation process creates the leavening agent needed for sourdough bread. Over time, the starter becomes a living culture that can be used repeatedly to bake bread.
The wild yeast in the starter ferments the sugars in the flour, producing carbon dioxide gas, which causes the dough to rise. The bacteria in the starter produce lactic and acetic acids, which give sourdough its characteristic tangy flavor and improve the bread’s texture and shelf life.
Steps to Prepare the Starter from Scratch
Day 1 Process
Mix 100 grams (about ½ cup) of whole wheat or rye flour with 100 grams (about ½ cup) of filtered water in a clean glass or plastic container. Stir until well combined. Cover loosely with a cloth or lid and let it sit at room temperature (around 70°F) for 24 hours.
Day 2 Process
You might see some bubbles forming, indicating the start of fermentation. Discard half of the mixture (about 100 grams) and add 100 grams of all-purpose flour and 100 grams of filtered water. Give it a good stir, cover it, and leave it for an additional 24 hours.
Days 3-7 Process
Each day, discard half of the starter and feed it with 100 grams of all-purpose flour and 100 grams of filtered water. Stir until smooth, cover, and let it sit at room temperature. The starter should become more bubbly and active each day.
Dough Preparation
- Begin by measuring your flour, water, salt, and sourdough starter.
- In a large mixing bowl, combine the flour and water first. Blend until all dry flour particles are removed.
- Give the mixture 30 to 60 minutes to rest. This rest period helps the flour fully hydrate.
- After the rest period, add the active sourdough starter and salt to the dough.
- Aim for a dough hydration level of about 75% (375 grams of water to 500 grams of flour). Adjust water as needed to achieve a sticky but manageable dough consistency.
Kneading and Folding Techniques
Now, let’s talk about some kneading and folding techniques that I use for dough preparation.
Hand kneading means using your hands to mix the dough, which helps develop gluten and lets you feel the dough as it changes. On the other hand, machine kneading uses a stand mixer with a dough hook. This method saves time and effort; just mix on low speed for 5-7 minutes until the dough is smooth and elastic.
The dough should rest for half an hour after mixing. Then, with wet hands, stretch one side of the dough up and fold it over itself. Rotate the bowl and repeat on all four sides.
Do this stretch and fold technique every 30 minutes, for a total of 3-4 times, letting the dough rest covered at room temperature between each stretch and fold. This method strengthens the dough without heavy kneading.
Fermentation Process
During the fermentation process, bulk fermentation occurs first, where the dough rests at an optimal temperature of around 75°F (24°C) for 4-6 hours until it increases in volume by 30-50% and becomes bubbly.
Shaping the dough follows, involving gentle pre-shaping into loaves or boules and using proofing baskets dusted with flour to prevent sticking. The second rise, or proofing, takes 1-2 hours at room temperature.
During this, the dough increases by 20-30% and passes the “poke test” to indicate readiness. Alternatively, refrigerated proofing slows fermentation for a longer period. It allows for more flavor development, while room temperature proofing is faster and results in a lighter texture.
Baking Process and Tips
- Preheat the oven to the specified temperature, typically around 450°F (232°C), for at least 30 minutes.
- Ensure baking vessels are preheated along with the oven to promote even baking.
- Use a sharp blade or lame to make swift, shallow cuts on the surface of the dough.
- Experiment with patterns like a single slash or a cross to achieve desired results.
- Place a pan of hot water in the bottom of the oven or spray water into the oven before closing the door to create steam.
- Steam helps develop a crispy crust and enhances oven spring.
- Bake the bread initially at a high temperature, typically 450°F (232°C), for 20-30 minutes to achieve maximum oven spring.
- Reduce the temperature to 400°F (204°C) and continue baking for 20-30 minutes until the crust is golden brown and the loaf sounds hollow when tapped on the bottom.
- An instant-read thermometer ensures the bread’s internal temperature reaches 200-210°F (93-99°C).
- To prevent a gummy texture, let the bread cool completely before slicing.
Cooling and Storage
After baking, it’s important to cool and store sourdough bread correctly. First, allow the bread to cool completely before slicing. It helps keep the texture just right. Place it on a wire rack in a cool, draft-free spot for even cooling.
Short-term works best at room temperature when storing it; you can use a paper bag or cloth towel to keep it fresh for 2-3 days. For more extended storage, freezing is great. Slice the bread, wrap it well, and pop it in the freezer.
Just thaw it at room temperature or warm it in the oven when you want some. These simple steps ensure your homemade sourdough bread stays tasty for longer!
Also Read:
Snoogle Pastry Recipe
Is Homemade Bread Healthier?
Undercooked Cheesecake
Final Words
Making sourdough bread with Ballerina Farm’s recipe is an incredible journey. I’ve covered everything from starters to baking, focusing on quality ingredients and traditional methods. Homemade sourdough offers tasty, nutritious bread with a unique flavor. I encourage you to try the recipe and share your experience. Happy baking!